
A TTGO T-Display demo app is available on Github/Phil-f6czv.
This application:
– displays an image and then a timed sequence of screens of different colors (red, blue, green),
– displays the power voltage on short-pressed GPIO 35 button,
– puts the ESP32 to sleep on the GPIO 35 button long press,
– launches a WiFi scan on short press of the GPIO 0 button and displays the result.
1 – INSTALLATION OF THE IDE DEVELOPMENT ENVIRONMENT
In order to upload the application to the T-Display with the Arduino IDE, the development environment for the ESP32 must be installed beforehand. To do this (source: randomnerdtutorials.com) the following operations must be carried out (updated on 10 April 2022):
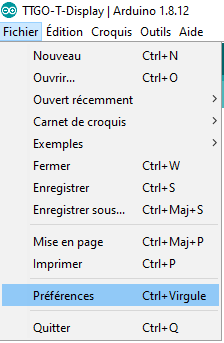
Open the File/ IDE Preferences menu
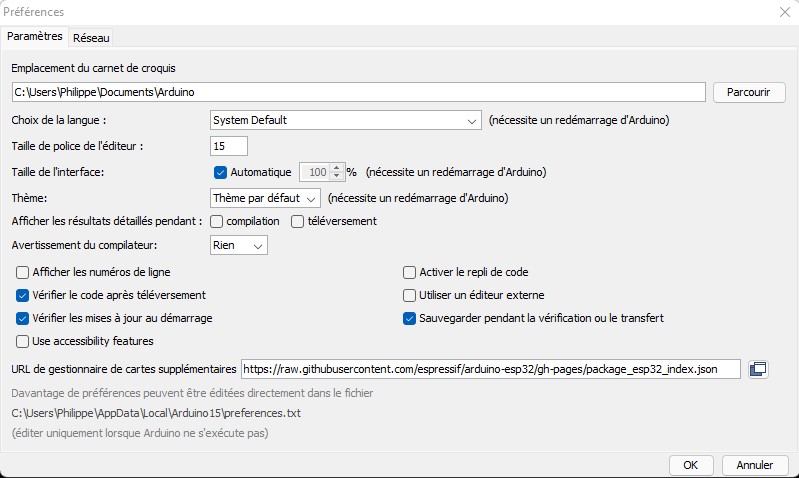
Enter “https://raw.githubusercontent.com/espressif/arduino-esp32/gh-pages/package_esp32_index.json” in the “Additional Card Manager URL” field. If there is already one, separate the URLs with a “,”
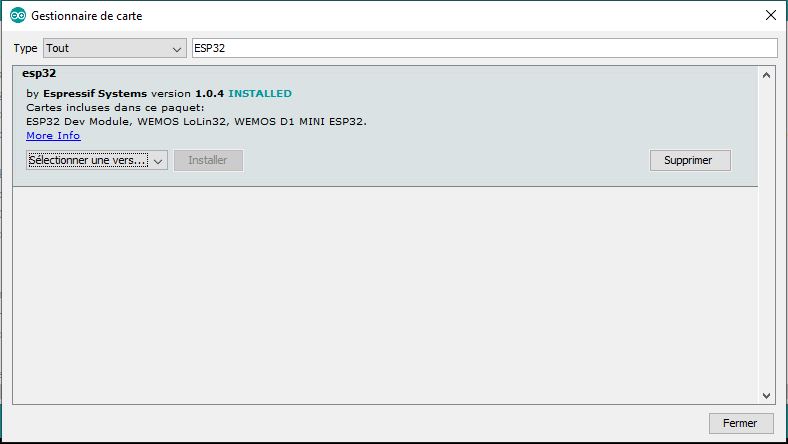
Open the board manager
Search ESP32 and click the Instal button for “ESP32 by Espressif Systems.” One gets after installation:
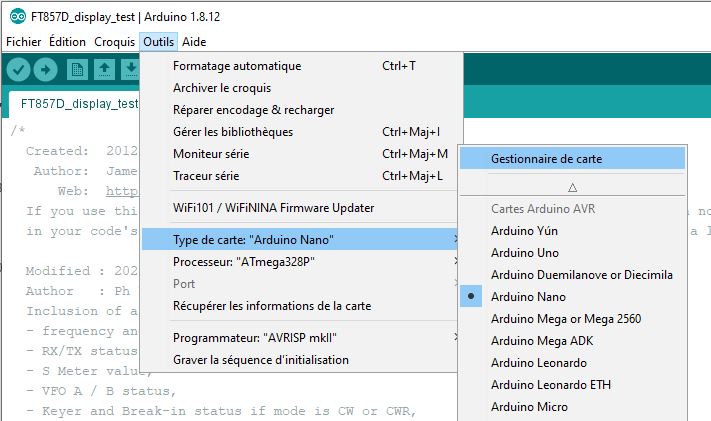
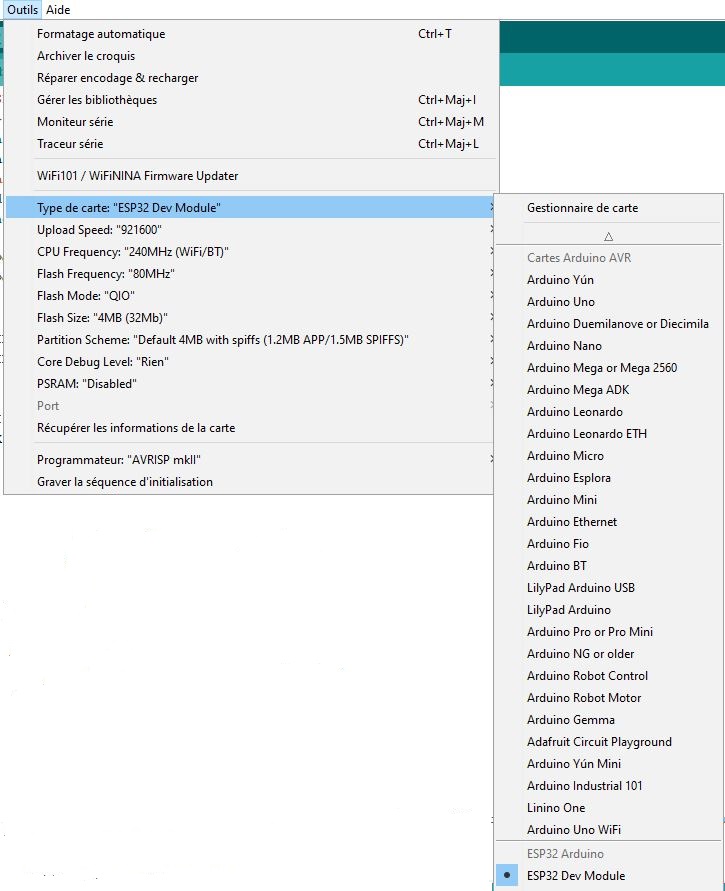
Connect the TTGO T-Display to a USB port (USB C interface on the TTGO) and select the “ESP32 Dev Module” card in the Tools/Card Type menu. Do not change the default settings.
Check from time-to-time that the ESP32 environment is the latest version as it may induce compilation errors with developments done with updated versions.
2 – INSTALLATION OF LIBRAIRIES
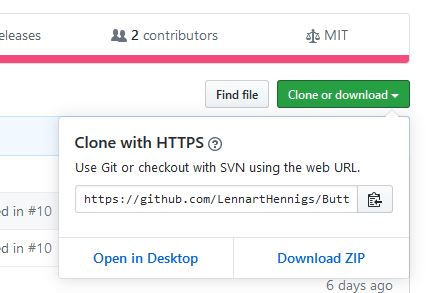
Download TFT_eSPI and Button2 librairies from GitHub:
– TFT_eSPI,
– Button2.
For this on each of the Github pages click on Clone or download and then on Download ZIP.
In the IDE check that the selected map is ESP32 Dev Module.
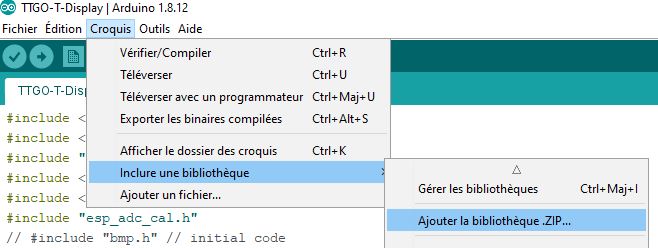
Include each of the libraries by:
All that’s left is the application to set up 🙂
3 – APP
3.1 Application provided
The application consists of two files to put in the same directory:
– the TTGO-T-Display.ino file,
– the bmp.h file that contains the image displayed at startup.
Both files are to be downloaded or copied/pasted from
Github/LilyGO.
You have to select the TTGO driver. For this in the file
C:\Users\xxxxx\Documents\Arduino\libraries\TFT_eSPI\User_Setup_Select.h:
– comment the line #include <User_Setup.h>,
– uncomment the line #include User_Setups/Setup25_TTGO_T_display.h>
3.1 App Customization
It’s easy to customize the app to familiarize yourself with the ESP32. For example, the writings are done in the vertical direction, which makes the characters very small. You can write horizontally by “tft.setRotation(1);” and increase the size of the characters by “setTextSize(2);”: it’s already much more readable.
It is possible to change the image displayed at start-up. This is done in two stages:
– generation of the image file name.h,
– modification of the file TTGO-T-Display.ino.
Image generation can be done through online sites or software. I chose the imageconverter565 software that was used to generate the original image in bmp.h. It can be found in UTFT Folder Tools in UTFT.zip.
Take the “.c” option and save under “.h”. Put the file in the app directory. In the generated file delete the line “include… AVR.”
Open the application in the IDE. (order is important)
In the TTGO-T-Display.ino file change the include of the image file:
#include <TFT_eSPI.h>
#include <SPI.h>
#include "WiFi.h"
#include <Wire.h>
#include <Button2.h>
#include "esp_adc_cal.h"
// #include "bmp.h" // initial code
#include "f6czv.h" /* replace f6czv by the name of your image
                  - remplacer f6czv par le nom de votre image - F6CZV
*/
Also change the name of the image in the tft.pushImage
tft.setSwapBytes (true);
  //  tft.pushImage (0, 0, 240, 135, ttgo); initial code
 /*   si on veut changer l'image, remplacer ttgo par le nom de l'image choisie - un décalage de pixels x, y
      est peut-être à mettre en place pour cette autre image.
       If we wish to change the image replaces ttgo by the name of the chosen image - a shift of x,y pixels is
       may-be necessary for this image */
    tft.pushImage (0, 0, 240, 135, f6czv); image f6czv
    espDelay (5000);
Good start with ESP32!